One of the most frequently asked questions we get at Vapor Apparel is, “What is the best way to print sublimated shirts?” We have all the answers for you in this blog and video! We also make it easy by providing you with the best sublimation-ready garments in the industry and a Vapor Foam Kit, which is essential to ensuring a high-quality sublimation print.
How to Print Sublimated Shirts: A Step-by-Step Guide
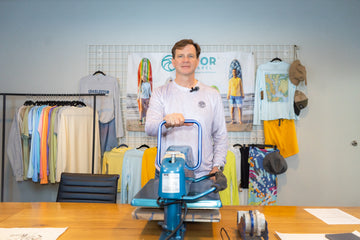
In this video, Jackson Burnett, founder of Vapor Apparel demonstrates how to sublimate on Vapor Apparel garments. You can also check out our tips for how to print sublimated shirts below. Be sure to check out all our How-Tos, and other fun content, on our YouTube Channel. Don't have time to DIY? We can help! Fill out our Request Form for info about Custom Orders.
Step 1: Get Your Materials
Gather everything you’ll need press a perfect retail-ready Vapor Apparel garment.
• Vapor Foam Kit, which has the Teflon Sheet, 13.2 square feet of heat-resistant foam (Available on our website.)
• Heat tape
• Scissors
• Graphic Print Transfer on Dye Sublimation Paper
• Heat gun to check the temperature of your press
• Heat press
Step 2: Cut the Foam

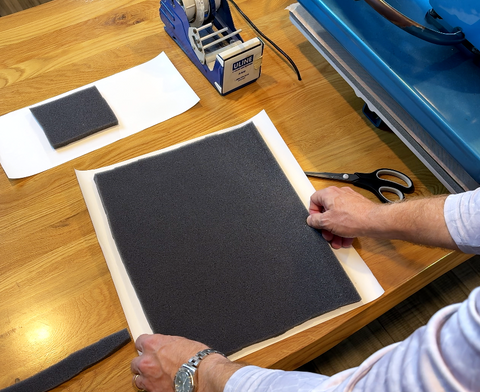
Make sure your foam is sized right for your print. Cut the foam so it’s about an inch smaller than the print paper on all sides. You may have to adjust your measurements, depending on the graphic print itself. You want the foam to be bigger than the print and smaller than the edges of paper.
Next, bevel the edges of the foam. This reduces pinch points where you could get a print defect.
Step 3: Load the Foam onto the Press
Take the foam pad that has been cut to the proper size and place it under the Teflon sheet. Then, secure the Teflon sheet with heat tape on the top and bottom. This way, the foam and Teflon sheet won’t slide out of place during production.
Step 4: Calibrate the Press | Time + Temp

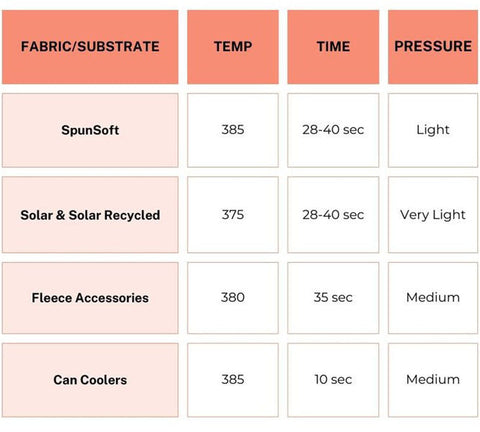
The time and temperature needed to press a back press on our solar fabric is 380-degrees Fahrenheit for 32 seconds. You’ll also want to adjust the pressure of the press platen so it’s not too heavy. Check our guideline chart for more info.
Step 5: Press Your Retail-Ready Garment

Next, take the shirt and hold it by the bottom seam and slide it onto the press. In the video, we use a large shirt. For a back print on a large shirt, we recommend that the bottom of the graphic sits 3.5 inches from the bottom hem. We take the print and lay that on the shirt. We also check the sides to make sure the shirt is centered on the platen. That will keep your print centered on the garment and in the right location.
Before you swing the platen into place, hold the paper with one hand (out of the way of the heat) to make sure the paper doesn’t move.
Once the press is in place, you lock it down. At the end of the dwell time, the press will beep. Swing the platen to the side, take a corner of the paper and peel it off. It’s very important to hold the shirt up and check for press lines and contamination. Once you’ve done a quality check, you have a retail-ready garment!
Need Help with a Large Order?
If you need help, we print sublimated shirts daily and can assist with large orders. Just reach out to our sales team and we'll be happy to help you with your Custom Printing and Private Label needs. Contact us at sales@vaporapparel.com or fill out our Request Form and we'll contact you!
We Love Our Customers
Check out some of our Testimonials to find out what our customers think about working with us!
Customer Spotlight: Cooper River Bridge Run
Customer Spotlight: Bowl Season
Customer Spotlight: Lowcountry Land Trust
Want to Become a Commercial Buyer?
If you have or are starting a business to sublimate shirts, we sell a wide variety of blank shirts for men, women, and children. We also sell accessories. Become a Commercial Buyer and purchase in bulk at any time. Learn more on our website.


